Thursday, May 31, 2012

5-28-2012 – Lime and Garlic Chicken


There is nothing quite like the disappointment of getting sick at the beginning of a three day weekend.  As you can guess I felt that this disappointment starting with a sore throat on Friday morning and full on congestion by the afternoon.  There are few things I hate more than being congested.  I have very sensitive sinuses and sleep apnea; the breathing machine I use just covers my nose, so I think you can begin to understand how rough of a weekend this was for me.  But I was able to pull it all together and whip up a new meal for Laura and I Monday night.  Now enough with the pity party let’s get cooking

I wanted to make something rather simple and easy.  I also wanted to keep the cost down and after a quick look thought my freezer that mean the chicken thigh was going to be the protein of the day.  Food Network website search yield a nice lemon chicken recipe that was ripe of tinkering and didn’t require buy anything other than limes and cooking wine.   

Keeping with the simple and easy motif I paired it with jasmine rice and my tarragon carrots.

Lime and Garlic Chicken:

What you need:
  • A baking dish
  • Oil brush
  • Small food processor or garlic press
  • 6 skinless chicken thighs
  • 1/4 cup of olive oil
  • 1/3 dry white wine
  • 1 tablespoon of lime zest
  • 2 tablespoons of fresh lime juice
  • 1 1/2 teaspoons of oregano
  • 1 teaspoon of kosher salt
  • 1 teaspoon of thyme
  • a pepper grinder
  • a salt grinder
  • a lime
  • 9 cloves of garlic

  1. Pre-heat oven to 400 degrees
  2. Mince the garlic (use the food processor or garlic press)
  3. In a dish combine the wine, zest, lime juice, oregano, thyme and kosher salt into a dish
  4. Heat the oil over medium heat and sauté the garlic for a minute or so
  5. Add the ingredients for the dish to the garlic and oil, stir till combined and then take off heat
  6. Pour the ingredients from the pan into the dish
  7. Pat dry the chicken
  8. Add the chicken to the pan and brush with oil
  9. Season the chicken with salt and pepper from the grinders
  10. Slice up the lime to eighths and place them in dish
  11. Bake for 40 minute
  12. Let rest for 10 minute covered in tin foil before serving.

This turned out all right, however in my hast I neglected to pan sear the garlic before adding in the other ingredients.  Also I put in a little more lime zest and juice than I should have.  These mistakes have been correct in the write up above.  To make matters worse on that front, Laura decide to drench her plate in sauce for from baking pan, before she tried it, rendering her food ruined to her palate.  Luckily I love lime and was able to eat her food and she was able to get her fill on the extra carrots and rice I made.

Despite the hiccups in the making of the meal it was rather tasty and I would love to get another crack at it.  I think that with a few tweaks this could be a real crowd pleaser.

Before I go, I have two upcoming events to plug.  If you are in the Philadelphia area, this weekend is the annual Wizard World comic book convention.  Laura and I will be there all weekend long in artist ally at table 2335.  Come on by and say hi.  As an add treat we will both be in costume.  I have a really awesome Doctor Strange outfit my friend made me and I can’t wait to show it off.

Speaking of showing it off, The following week (Thursday 6/7/2012) There will be a Cosplay Fashion show at Philly RAW Artist organized by one Laura Guzzo.  There I will be once more donning the cape and getting my Doctor Strange on.  The RAW events are always a great time and feature artist doing everything from painting and photography to clothing design and body painting.  There are even a couple of bands playing. 

I hope to see you at one of these events.  Till next time, get the hell out of my kitchen.


Wednesday, May 23, 2012

5/18/2012 – Blueberry-Peach Pancakes with Scrapple


With Laura in South Carolina promoting Shakespeare Shaken, I was left to my own devices when it came to the new recipe for this week.  A week that proved to be particularly stressful.  The second incredibly stressful week in a row to be honest.  With that in mind I decided to treat myself to breakfast for dinner Friday.

My favorite breakfast has always been Pancakes.  When I was kid, every Sunday my Dad would make a big pancake breakfast with eggs and a rotating cast of breakfast meats.  Of the breakfast meats, I‘m partial to that quintessentially Pennsylvanian delicacy scrapple.  He would make a giant stack of pancakes for my Mom, sister and I, that we would snack on all day long.  It was perfect for a nice lazy Sunday.


For my lazy Friday night, I took my Dad’s pancake recipe added a double helping of peaches along with a liberal helping of fresh blueberries.  Combined with some nice thin sliced Scrapple induced a worry free food coma.  It was just what I need to chase my worries away.


Blueberry-Peach Pancakes

What you need:

·         3 cups of Flour
·         5 Teaspoons of Baking Powder
·         2 Teaspoons of Salt
·         3 Tablespoons of Brown Sugar
·         2 ½ cups of milk
·         2 eggs
·         1 stick of butter
·         1 can of peaches
·         1 small tub of blueberries
·         A griddle
·         A blender
·         A pastry knife (optional)

1.       Add the Flour, salt and Baking Powder to a large mixing bowl, be sure to mix the two together well.  I recommend using a pastry knife for this.  If the Baking Powder is not mix in properly it will create bitter pockets in you pancakes.
2.       Melt the stick of butter in a small bowl.
3.       Add the brown sugar to the butter and mix until it creates a cream.  This will help sugar distribute evenly thought the pancakes
4.       Beat the eggs and add them with the milk to the creamed butter
5.       Add your wet ingredients to the dry and mix until they are completely mixed together
6.       Place the peaches into the blender and purée
7.       Mix in the puree peaches and blueberries to the other ingredients
8.       Heat you griddle on low to medium heat
9.       Pour out ¼ cup of pancake mix on to the griddle
10.   Once the pancake start to bubble flip it, the longer it bubbles, the dark the pancake
11.   Let the pancake cook on the other side for about half to three quarters the time of the first side.

The key to good scrapple starts with the cut.  For those who have never seen scrapple, it comes in a brick.  You want to cut off thin slices from the short side, like slicing bread.  Each piece you cut off should be no more than an eighth of a inch thick.  Then heat up a tiny bit of olive oil in a pan and fry the scrapple until it golden brown and crispy on both sides.  I like to cook it in a cast iron skillet.

Once I have my scrapple and pancakes, I add the perfect finishing touch, a helpful serving of real maple syrup.  I cannot stress this enough, you want real maple syrup.  Once you have the real stuff you can never go back to that fake flavored corn syrup garbage that they sell next to the instant pancake mixes.

A chased this carbtastic meal down with a nice cold glass of milk.  It really hit the spot and lifted my mood tremendously (along with my triglycerides I’m sure).

Once last thing before I go, Laura and I will be at WizardWorld Philly (May 31st - June 3rd).  If you live in the Philadelphia area come on out and say hi.  If you come on Saturday I’ll be wearing my Dr. Strange costume that a friend made me.  Plus, not to bury the lead too much, you will get to see and possibly buy some of Laura wonderful art.  She really is a wonderful and talented artist.

That’s enough shilling for now, till next time, Get the Hell out of my Kitchen.


Monday, May 14, 2012

Happy Belated Mother’s Day!


Due to this past weekend being Mother’s day as well as the fact that Laura and I had tickets for a plan on Saturday night, there really wasn’t time to make a new recipe.  But fear not, for I will still provide for you gentle reader.  This week we take a look at the recipe that started it all, Old Man Mitchell’s Ginger Plum Chicken.

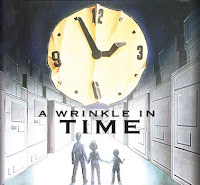
http://peopleslight.org/production/wrinkle-timeI this information may come a little too late to be useful, but Laura and I saw the People’s Light and Theater’s production of A Wrinkle In Time on Saturday and it was amazing!  I read the book multiple times as child.  Because of my learning disabilities I went to 4 different schools between 1st and 7th grade and being able to read a having stories where the main characters are special because they think differently, really meant a lot to me.

The play is a wonderful adaptation of the source material.  The staging is remarkable and really quite brilliant.  The use light and sound gave the minimalist stage a real sense of place.  The acting was also top notch, especially that of Emilie Krause who played Meg and Conrad David Sager who played Charles Wallace.  The show runs till 4/20 and if you are in the area I highly recommend checking it out.  However please note, they do employ a fair amount of flashing light, so if that sort of thing bothers you, it’s best to just read the book and enjoy the story that way.

Now, on to this week’s meal.  I found a Ginger Plum chicken recipe in book of Chinese food recipes that was given to me along with a wok one Christmas by my best friend’s mother.  I have altered it over the years to such a degree that really they only share a name in common.   This recipe recently won a recipe contest at work.

Old Man Mitchell’s Ginger Plum Chicken

What you need:
·         4 skinless boneless Chicken Thigh
·         One package of Japanese Udon Noodles (I recommend Nasoya brand)
·         2 tablespoons of Olive Oil
·         2 tablespoons of finely chopped Ginger
·         3 Tablespoons of Bragg’s Liquid Amino (soy sauce substitute)
·         4 Tablespoons of Plum Sauce (I recommend Kikkoman brand)
·         1 pepper cut into small to medium pieces (green or red as to taste)
·         1 cup of Quartered Baby Carrots (more or less to taste)
·         A hand full of sugar snap peas or snow peas
·         A good sized Wok (Ikea has them cheap)


1.       Add Oil and Ginger to a Wok and let it sit
2.       In a pot boil water and cook the Japanese Noodles as per the packages instruction, add a pinch of salt for taste.  This should take about 8-9mins
3.       While the Noodle cook, chop the vegetables and set aside.  Then slice the chicken into 1 inch pieces
4.       When the noodle are done, place a lid on the pot to retain the heat
5.       Put the Wok on high heat and stir fry the Ginger until it starts to change color (30 sec to a min should do)
6.       Add Chicken and Bragg’s Liquid Amino to the Wok, stir fry till the chicken is almost cooked
7.       Add the Carrots, Peppers and Plum sauce to the Wok. Stir fry for a 1 to 2 min
8.       Drain the noodles and add to Wok, stir fry until the noodles are infused with the sauce
9.       Add the Peas, stir fry until the peas are warm and covered in sauce
10.   Take off heat and let cool for 5 min then serve

This dish has been a long time favorite and I have found that it just as good the next day cold as it is fresh off the stove.  You should also feel free to put any other vegetables you like in it.  If you do try this meal or any of my other recipes, drop me a line and let me know how they turned out.

Next weekend Laura will be at XCON is South Carolina promoting Shakespeare Shaken, a new book that she has contributed art to, so I’ll be on my own.  Drop me a line if there is a protein you want me to feature or if I should go hog wild and have Breakfast for dinner!

Till next time, Get the hell out of my Kitchen.

Tuesday, May 8, 2012

5/6/2012 - Sweet Spicy Steak with Jasmine Rice and Ginger Sugar Snap Peas


The Avengers movie premiered this weekend and we here at Old Man Mitchell’s Kitchen are a bunch of giant comic book nerds so we had to assemble the gang for trip to the theater.  We’re also a bunch of cheap skates who hate crowds.  A Sunday Matinee was the only logical choice for screening times.  The movie was awesome and I’ll most likely see it again before it leaves the theater.  The characterize was great, the action was amazing and for the first time on the big screen the Hulk special effects looked good.  Between this and Cabin in the Woods, I really wish Joss Whedon would write every movie.


The only problem with seeing a two and half hour movie in the middle of the day, it eats up a good chunk of your day.  Once we got back home it was already time to start dinner.  Knowing that was going to be the case I picked a really easy and fast meal to make, Sweet Spicy Steak with Jasmine Rice and Ginger Sugar Snap Peas.


I found the inspiration for the steak recipe on Food Networks website.


As is my nature, I tinkered as I went and made it my own.  This time out I found myself adding as much as I took out of the original.  The result was a flavorful but slightly overdone steak.  Next time I will cook it a little less or use a thicker cut of meat.

Sweet Spicy Steak:

What You Will Need:
  •   A London Broil Steak (about 1.5 pounds)
  •   3 Tablespoons of Olive Oil
  •     2 Tablespoons of Hot Paprika
  •     2 Tablespoons of Ginger
  •     2 Tablespoons of Honey
  •     2 Tablespoons of Brown Sugar
  •     1 Tablespoon of Kosher Salt
  •     1 Tablespoons of Curry Powder
  •     1 Lime, zested
  •     A broiling pan

  1.        Max all of your spice, oil and honey (basically everything but the steak) into a bowl to make a paste
  2.        Lather the paste on both sides of the steak, reserve about a third of the paste to use as a sauce while serving
  3.        Broil for about 5min a side (less for a rare steak), don’t leave on too long or the honey in the paste will burn
  4.        Put the steak on a cutting board and let rest under tinfoil for 5 to 10 minutes
  5.        Cut and serve, put a little of the paste on the plate as a nice dipping sauce

The decision to make the Ginger Sugar Snap Peas was made on the ride home from movies.  Originally we wanted to make Garlic Sugar Snap Peas, but when I started to cook I realized we used all the garlic up last weekend.  So as Laura put it “we switched to the next best thing.”  The peas turned out OK.  The ginger gave them a great tasted, but I used too much oil and I overcooked them a bit.  Also they sat for a bit before the steak was done resting.  If you make this be sure to wait till the steak is just about done resting before you start the peas.

Ginger Sugar Snap Pea:

What You Will Need:
  •  Handful of fresh Sugar Snap Peas
  •  Extra Virgin Olive Oil
  •  1 Tablespoon of Ginger
  •  A medium sauce pan

  1.       Put just enough oil in the pan to lightly cover the bottom
  2.       Add the ginger to the pan
  3.       Put the pan on high heat
  4.       Cook the ginger until it starts to fry up and change color
  5.       Add your peas
  6.       Cook for no more than a minute, just enough to get the pea warm and infuse the ginger flavor.

Despite the minor cooking hiccups all of the flavors really played well together and was a nice tasty meal.  As a testament of that there were no left overs, on even the end bits of steak.  I think that with a tweak or two the paste would work well as a Bar-B-Q sauce on skinned chicken thigh.  I’ll be trying that out later this summer.


One other thing I want to talk about before I go is Ginger.  I use it in a lot of dishes; however I have never really had luck with fresh Ginger.  I find often when I buy it from the store and cut into the Ginger has an odd blue color and wired texture. To my mind these pieces have clearly gone bad.  So either the store keeps Ginger way too long or I’m crap at picking out Ginger.  Both are most likely true, but I have found a solution.  Some of the stores near me sell this Ginger in a tube.  This stuff is great.  You can buy a ton of it and stick in the freezer and know that you will have good “fresh” Ginger when you need it.  Also I find it save a ton of time as you don’t need to cut it.  An added bonus, it dissolves into sauces really nicely.

That all for this week

Until next time, get the hell out of my Kitchen.

Thursday, May 3, 2012

4/29/12 – Italian Breaded Pork Chops with Apple Chutney, Jasmine Rice and Old Man Mitchell’s Tarragon Carrots.


This weekend was the first time I got to see Laura in several weeks.  She is a freelance illustrator and did some comic book conventions out of town.  As a surprise present I bought her the Unofficial Hunger Games cookbook.  We had both read the books and really liked them.  One thing that really stuck out for us was the description of the food and often would find our mouth water at the description of various breads and stews. 

The protein in this week’s dish, Italian Breaded Pork Chops, comes from that book.  Surprisingly, I didn’t alter it much and kept it more or less as it.  The only real changes I made was I used Panko bread crumbs instead of Italian seasoned bread crumbs and where the recipe called for an Italian Seasoning mix, I had Laura look up what is normally in Italian Seasoning mix and we just made our own blend.


Normally this is where I would put the recipe but because it came from a book and I didn’t make it my own, I’m going to respect their copyright and just tell you that it is a good cook book and I look forward to trying more things from it.

For side dishes I made Jasmine rice which is always an audience favorite and much tastier then normal white rice.  I also made my Old Man Mitchell Tarragon Carrots.  This is a really simple and flavorful way to prepare carrots. 

Old Man Mitchell Tarragon Carrots

What you will need:
·         A pad of butter
·         Handful of Carrots (really as many carrots as you plan on eating)
·         Dried Tarragon flake
·         a small to medium size pan that is just big enough to comfortable hold the carrots so that will all be able to touch the bottom of the pan at the same time

  1. Over medium to high heat melt enough butter to cover the bottom of the pan.  Let the butter start to brown a little bit
  2. Add the carrots and sauté them until the start to change color
  3. Sprinkle a liberal amount of tarragon on to the carrots then sauté for another 20 to 30 seconds
  4. Sever hot and enjoy

In addition to those two sides I also took inspiration from a Pear Chutney recipe I had made a few months back and created an Apple Chutney.  Because I’m not a big pepper fan (and because I forgot to get some from the store) I double up on the ginger to make up for a possible lack of heat that would have come from a jalapeno pepper.  That turned out to be a good choice and is now part of the recipe.

Apple Chutney

What you will need:
·         Medium to Large sauce pan
·         2 tablespoons of butter
·         3 granny smith apples
·         ½ cup of apple cider vinegar
·         ½ cup of raw sugar
·         ½ cup golden raisins
·         3 tablespoons of Ginger
·         ½ tablespoon of fresh ground pepper
·         ½ teaspoon of hot paprika
·         ½ teaspoon regular paprika
·         ½ teaspoon of fresh ground all spice
·         ¼ teaspoon of salt

1.       Peel, core and chop the apples into small pieces, ½ to ¼ inch in size
2.       Place all the spices in a bowl
3.       Over high heat melt the butter
4.       Sauté the apples for 2 to 3 minutes
5.       Add the vinegar and ginger then stir for 30 sec or so
6.       Stir in the spices
7.       Turn down to medium-high heat cook for 45 min stirring occasionally as the liquids thicken.  .

This meal turned out really well.  All of the flavors play together nicely.  I especially like the way the jasmine rice took some of the bit away from the chutney but still left a pleasant warmth in my mouth.  Laura also really liked it and said that it was even better as left over the next day once all the flavors had melted together.

One thing we found with the chutney is that it takes a while to make, but you can leave on a low heat more or less as long as you like and it’s actually going to be better for it.  The longer the ingredients have to marinate together the tastier the chutney will be.

I hope you enjoyed hearing about this week’s meal and it inspires you to try it yourself.

Until next time, get the hell out of my kitchen.
Tuesday, May 1, 2012

Hello World


Welcome to Old Man Mitchell’s Kitchen, Come on it a pull up a chair.  Being this is the first post to the blog, I probably know you.  If that’s the case, thank you for being a good friend and checking out my blog.  If I don’t know, please leave a comment how you came to find my blog.  Are you from the future where I’m somewhat noteworthy and you’re reading old post?  I hope I known for something good.  If not, I’m sorry and I’ll try to do better next time.

But enough about possible future infamies, let’s talk about why I’m starting a blog and where I plan on going with it.  I really like cooking (and eating so it’s handy I’m a good cook) and every Sunday I would make a nice dinner for my Girlfriend Laura and I.  We found that we both really liked ginger plum chicken, and I made it for weeks on end.  I made it so much that towards the end of last year we started to get kind of sick of it.  This lead me to make a New Year’s Resolution that I would cook us a different meal each week using a recipe that I have never tried before.

Our little experiment in culinary exploration was a smashing success and we have had some treaty meals because of it.  It has been such a success that Laura start telling me I should do a blog for the experiment.  While I agreed that this would be fun, I was embroiled a different writing project at the time (I’ll give more details on this at a later date) and things at work were getting really busy.  So in lieu of a blog I post some pictures and rough details of each dish on Facebook.  This was OK but not satisfying and really hard to keep up with as Facebook’s interface is somewhat limiting to say the least.

Now, after months of putting it off, I finally set up a blogger account and create this, Old Man Mitchell’s Kitchen.  Here, each week I’ll post a picture of the weekend’s meal, the Recipes I used (or where to find if it’s copy written) and what I thought of it.  I should have last Sunday’s meal up by Wednesday; it was Italian Breaded Pork Chops, with Jasmine Rice, Apple Chutney and my Tarragon Carrots.

I’ve also started getting into knitting.  A good friend of mine has been giving me lessons and I find it very relaxing.  Plus I have been able to make some useful things, like a scarf for Laura and tube cover for my BiPap machine.  I’ll start posting my future projects when I finish them. Here we have a picture of the very first thing I made, it’s my practice Frankenscarf. 

That’s all I have for now.  Get the Hell out of my Kitchen and I’ll see you later.